Position Editor
Use the Position Editor to crop an image, create color blocks or relative placement elements, add Gamma, Sharpness, or Hybrid to images, and to enter job-identifying text.
- Select one or more positions in a layout
- Select Position Editor on the Layout menu, or click the toolbar button.

Use the menus and and the icons on the toolbar to select existing elements, to create relative place elements, color block elements, or text (char gen) elements; to toggle irregular element mode; to measure or set reference point; and to zoom up or down.

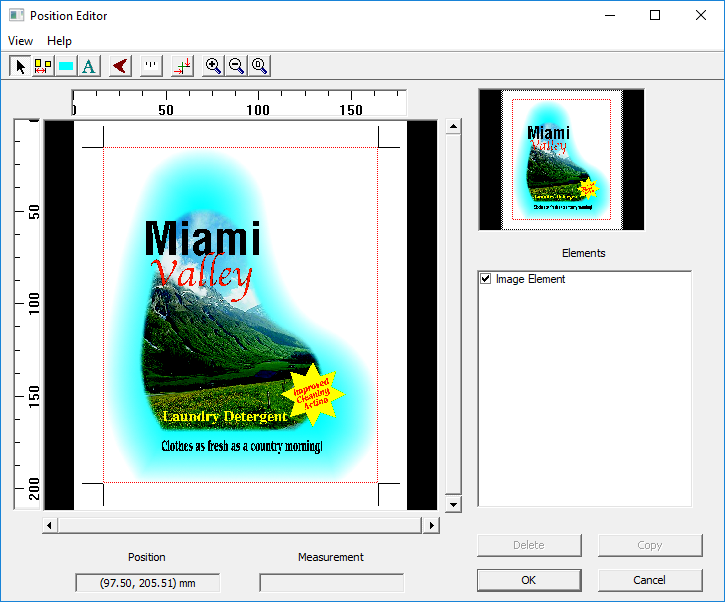
There are two displays of the image. The area on the right is a thumbnail of the entire image. You zoom up or create elements in the larger area on the left.
The Toolbar
| Select an element or move crop edges | |
| Create a Relative Placement element | |
| Create a Color Block element | |
| Create a Character Generator element | |
| Toggle irregular mode. Use with Relative Place or Color Block tools. | |
| Set a point and measure | |
| Redefine image reference point from upper left | |
| Zoom up | |
| Zoom down | |
| Zoom to entire image |
Elements
The Elements list shows any elements you have created. The Image Element is always present and cannot be deleted. Select an element to edit, copy or delete it.
Image Element
Use this window to set the crop rectangle size, set MIS or irregular shapes, and select curves and filters.
Relative Placement Element
Use this window to define an area on the image and specify curves or filters to be applied within the relative place element.
Color Block Element
Use this window to set the color and density for the blocker and specify curves or filters to be applied to it.
Character Generator Element
Use this window to define the font, size, and color for the text, and the repeating values if desired, and to specify curves or filters to be applied to it.
Complete information is in the Collage online help.